For 1 Minute of Your Time

I love it when I get sent to the beach.

The beach means sun and sand and surf, frosty margaritas, and Speedo fishnet juniors. I’ve had the same one since I was twelve, and though it has frayed a bit at the edges, it still fits like a charm.

Beyond the inappropriate swimwear, I always look forward to casting a spell over the ocean. From the moment I picked up a camera, I’ve loved long exposure photography, its power to manipulate water, and how it can transform what would otherwise be a mundane scene into something visually stunning and ephemeral (as ephemeral as a photo can be, anyway).

A couple of months ago I was sent down to the Dominican Republic to wrap my head around Punta Cana. I had an amazing time – between diving excursions, helicopter trips, lagoon cruises and horseback rides, I found some time – and the required energy – to shoot when the sun went down. 

I go at the ocean with an image already in my head – I’m not reacting to the setting and the scene as much as I am manipulating it. To manage this manipulation, I need a few tools.

THE GAZEBO BLUES
Dominican_88511-2-2

The Down and Dirty:

*I wrote the following few paragraphs when detailing the Uluru long exposure frame a few months back. Just a quick refresher here, as many concepts remain the same.

“If you’re a fan of long-exposure photography but never knew where to begin – if the process of setting up and shooting such an image has ever seemed intimidating – this walkthrough should please you. It’s deceptively simple to put together a frame like this, and if you follow these steps, you’ll be out the door and firing away in no time.

“The first thing to consider when planning a long-exposure image is just what you want the final frame to look like. Take a look at your scene; are the clouds moving quickly? Do you have have running water somewhere in the frame? If the answer is yes, a long-exposure image should be able to lend a feeling of motion to your photograph. But also keep in mind elements that can become distracting. Do you have trees, grass, or other foliage in the frame that can be affected by the wind? If the answer is yes, then there’s the potential to add distracting blur with a long exposure.

“Now, if you’ve done any sort of long-exposure work on an DSLR in the past, you know that most cameras can’t go past the 30 second exposure limit without a timer; you could easily pull off this same shot with a simple cable release, but I prefer to do all of my timed work with a Trigger Trap Mobile Dongle + App; this bit of kit is invaluable for long-exposure photography, and is my go-to gear for star trails, bramping, timelapses, and more. Now, knowing that your camera can only make an exposure reading for a maximum of 30 seconds, you need a way to exposure properly for anything longer than that. You don’t want to guess at correct exposure when shooting for 3, 5, or 10 minutes at a time – that’s a long time to wait while you goof up an image, especially when good light is so fleeting.”

So here we are – now on to the beach!

Step by Step:

1. Compose your scene. Lock in the “look” before you start fiddling around with exposure, timers, etc. so that you can be confident you’re going to get the image you want. Oh, and make sure you’re set up on a sturdy tripod.

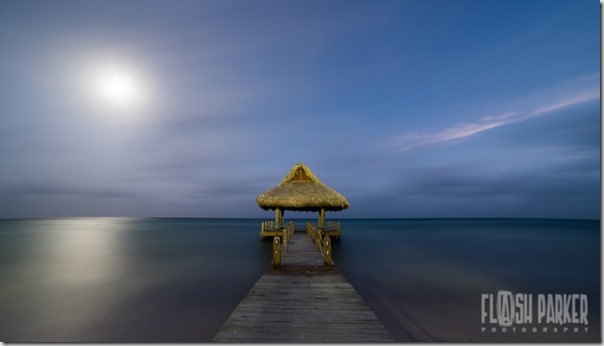
I wanted the gazebo to stand out in my frame, but I also wanted to catch a bit of sky and sea. The water was fairly rough, so I knew from past experience that an exposure time beyond 30 seconds was going to smooth it out nicely. Heck, I could have smoothed out the water with a 10 or 15 second exposure – but I also wanted to smooth out the slow-moving clouds.

2. Lock your focus; I focus these scenes manually (I often do this in Live View and “peak” to ensure pinpoint accuracy). Here, of course, I focused on the gazebo. It doesn’t get any easier.

3. Set your exposure length via your timer (buy yourself a Trigger Trap if your camera is incapable of shooting anything beyond 30-second exposures; this little piece of kit has made my job incredibly easy).

For this image I knew that I wanted to smooth our those pesky clouds, so I dialed in an exposure length of 3 minutes. This is all about personal preference; 30 seconds would have easily smoothed out the water, but left the clouds fairly well formed. The length of the exposure greatly affects the look of the final image, and is all about what you want to see.

4. Open the shutter, and relax. Grab a coffee and marvel at your surroundings. Do what you do with time to kill in one of the world’s most beautiful places.

Image Specs:

Camera: Nikon D800

Lens: Rokinon 14mm f/2.8

Aperture: f/20

ISO: 50

Shutter Speed: 180 seconds

Focal Length: 14mm

THE NIGHT
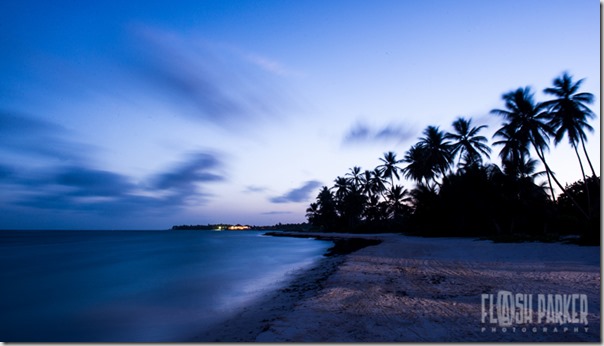
Dominican_88799

This image is a prime example of what moving objects can do to your scene – see Exhibit A: Punta Cana palm trees. However, in this case I quite like the movement; it lends a bit of ephemeral flare to the image, and works decently well with the cloud streaks and the smooth water. Again, this is personal choice; some photographers want trees to be still, others don’t mind a bit of motion blur.

Two things changed between the first image and this one: first, the lens: I swapped out my ultra-wide for my standard zoom, and shot at 29mm. Second, the shutter speed: I had more light (thanks to the setting sun beyond the trees) and thus didn’t need to expose for 180 seconds – in this image I opened the shutter for 120 seconds.

It always amazes me just how much you can change the look and feel of a scene just by adding or subtracting a few seconds from your shutter speed. Making this sort of image is deceptively simple – you can easily practice with any camera that shoots up to 30 second exposures – but to really take your gear to the next level, invest a few pennies into a release like the incredible TriggerTrap.

For the Making of both images:

1. Nikon D800 Camera

2. Rokinon 14mm f/2.8 lens and Nikkor 24-70mm f/2.8 lens

3. 77mm B+W Kaesemann XS-Pro Circular Polarizer

4. Trigger Trap Mobile Dongle + App

5. Manfrotto BeFree Carbon Fiber Travel Tripod

Special Thanks:

Special thanks to my friends at AFAR Magazine for sending me on an incredible assignment to one of the Dominican Republic’s most remarkable locations. Also to my gracious hosts at the Puntacana Resort & Club – the Dominican’s premiere vacation destination.

Catch up with me on Twitter: @FlashParker

Follow my photography adventures on Instagram: FlashParker

Gear Review: Nikon 1 Nikkor VR 70-300mm f/4.5-5.6

Bigger is better when you’re face down in the bush. I think Hemmingway once said that to Fidel Castro – I’m sure Ernie was talking about the size of his scotch tumbler or the gauge of his rifle shells, but for my own purposes I’m going to ape the phrase and use it to refer to big, long glass.

But first I’d like to qualify this gear review and tell you exactly why I need a big, long lens in the first place. I’m a travel photographer first and foremost, which means from time to time I’m tasked with shooting animals. But I’m not a wildlife photographer; I don’t carry with me into the field 1200mm lenses that weigh 200lbs, 12-foot monopods, or blocks of salt to lure animals out of hiding. I travel as light as I possibly can with just enough gear to get my job done.  Most of my shooting is of the up-close-and-personal variety, which means my Nikkor 24-70mm f/2.8 and Nikkor 50mm f/1.4 lenses see the most field action.  I’m usually shooting people in urban or rural environments, and only use my longer lenses – like the Nikkor 70-200mm f/2.8 – to shoot portraits or compress perspectives.

That said, I’ve been sent out on some amazing travel assignments these last few years, some with a strong wildlife component. I’ve stared boobies in the face in the Galapagos Islands, held my own against grizzly bears in Alberta, and danced around cheeky vicuna in Chile. I’ve needed big glass on these and half a dozen other assignments, but I’m loathe to carry across the world a lens that weighs more on its own than the rest of my luggage. Lucky for me, I found the perfect solution just before I set out on safari assignments to Dubai and South Africa.

Enter the Nikon 1 Nikkor VR 70-300mm f/4.5-5.6 lens.

This lens, designed specifically for the CX-sensor Nikon 1 camera series, provides an effective focal length of 189-810mm. I don’t care what tech types have to say about “effective reach vs active reach” and all that sensor size vs length nonsense – if a lens is able to provide reach in the 800mm range and not weigh more than my car, I’m willing to give it a try.

I stressed over which lenses to take with me to Africa for weeks; I considered buying the Nikon AF-S NIKKOR 80-400mm f/4.5-5.6G ED VR Lens, but after testing it in store, I knew I wanted even more reach.

I bought the Sigma 150-500mm f/5-6.3 DG OS HSM APO Autofocus Lens for Nikon AF and returned it after one day, as I found it almost unwieldy and too different from my Nikkor lenses for me to operate smoothly and efficiently. It also didn’t fit into my camera backpack, which is sort of ridiculous.

I wanted to try the Tamron SP 150-600mm f/5-6.3 Di VC USD Lens for Nikon, but so do a lot of people – the lens has been unavailable for months.

I wasn’t even going to consider lenses like the Nikon AF-S NIKKOR 800mm f/5.6E FL ED VR Lens or the Nikon AF-S NIKKOR 500mm f/4G ED VR Lens because I didn’t want to have to pay a sherpa to haul my gear, and I’m not after lenses that cost the same as fighter jets.

It seemed like getting over 400mm for this adventure was out of reach, until I stumbled upon the Nikon 1 series of lenses. I took a flyer, ordered the lens, and got my hands on it about 3 hours before I departed for Dubai.

South Africa_6105

King of the Jungle: Tack sharp results with this lens, even extended out to 267mm – handheld on a mirrorless body lacking a digital or optical viewfinder.

Nikon 1AW1 | 267mm | f/6.3 | ISO-560 | Shutter: 1/125 sec.

Let me tell you what I love:

– The reach.

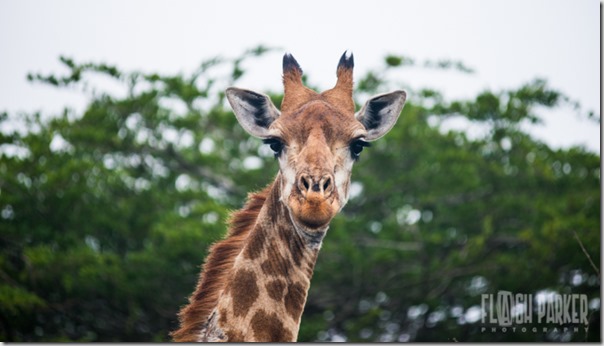
This lens is a monster, as advertised. 189-810mm is mind boggling, no matter what sensor you’re shooting on. I had a great time shooting game – from lions and leopards to crocodiles and kingfishers.  I’ve never had a lens I could use for birding, until now.

South Africa_5829

Even fully extended, this Nikon 70-300 is incredibly sharp.

Nikon 1AW1 | 300mm | f/7.1 | ISO-280 | Shutter: 1/250 sec.

– The sharpness.

Sharp as a tack, from what I’ve seen so far. Surprisingly so – and throughout the entire focal range. I can use this lens at 70mm the same way I can at 300mm, which is a serious testament to build quality.  I used this lens all the way extended quite frequently on this trip, just to see how it would respond, and was quite thrilled with the results.

South Africa_5889

Even in reasonable light this lens is immaculately sharp. It struggles as you’d expect when it gets darker (due to the relatively small maximum aperture) but with the excellent VR, I could handhold this lens until dusk. Also note how slow my shutter speed was in this case; using 1/60 at this focal length should lead to blurry images, but out of the dozen I shot of these monkeys, only one was not crisp.

Nikon 1AW1 | 112mm | f/7.1 | ISO-1250 | Shutter: 1/60 sec.

– The Bokeh.

Initially I was worried that bokeh wouldn’t be pleasing, given the sensor size and the speed of the lens, but that concern was quickly quashed. Thanks to the 7 rounded diaphragm blades, out-of-focus areas are rendered very smoothly – and when you’re shooting at these focal lengths, you’re generally going to get smooth backgrounds no matter what aperture you’re using.

South Africa_3631

Bokeh as smooth as silk.

Nikon 1AW1 | 200mm | f/7.1 | ISO-640 | Shutter: 1/320 sec.

– The Autofocus.

Lightening fast. Ridiculously so, in fact; the Nikon 1 series of cameras are renowned for their autofocus capabilities, but this lens on a Nikon 1 body takes things to another level. Even in low light the lens rarely hunted for focus. Easily my second favorite aspect of using this lens (after length): the AF is simply blazing fast.

South Africa_5358

A good example of the manual/macro touch-up ring in action: The camera kept locking focus on the grass in the foreground, and was unable to find mama lioness. I simply tweaked the focus ring (which zooms into a macro mode automatically to pinpoint eye location), and locked on the cat’s face. The macro focus mode can take a bit of getting used to, but once you’ve figured it out, you’ll wish that all your cameras and lenses behaved in the same manner.

Once again, notice the shutter speed – 1/25 is outrageously slow for this focal length; with my D800 and 70-200mm lens, I can rarely get a steady frame at 1/25 and a length out past 100mm.

Nikon 1AW1 | 235mm | f/5.6 | ISO-3200 | Shutter: 1/25 sec.

 South Africa_4965

Nikon 1AW1 | 300mm | f/8 | ISO-800 | Shutter: 1/80 sec.

Now, the caveat here is that I was using this lens on my Nikon 1AW1 – my underwater body. Two things on this body make focusing with a big lens a pain; the lack of a viewfinder and the lack of a focus selector button. The lack of a viewfinder is obviously problematic for when shooting in bright sunlight (even seeing the screen can be a pain), and I’m not as steady as when holding a camera to my face and looking through the finder. The lack of a focus selector means that sometimes the focus locked on a tree or the wrong animal or something that it was never supposed to see – I could use the neat little “macro-focus touch up” dial on the lens, but doing this while keeping the camera steady and looking at the screen was a pain. Do like me and pair this lens with a Nikon 1 body with a viewfinder – the first purchase I’m making when I head back out on an assignment where I’ll be using this lens is the Nikon 1V3, which will take care of both of these issues.

Dubai_3075-2

Handheld at 300mm – effectively 810mm on the CX sensor. No cropping, and no adjustments – this is what I saw through the lens, and what the camera captured. 

Nikon 1AW1 | 300mm | f/5.6 | ISO-160 | Shutter: 1/400

South Africa_4896-3

Getting in close is a great reason to buy this lens – it’s an indispensible wildlife and safari tool, in my opinion. But it’s also a brilliant device for compressing distance, and bringing your background closer to your foreground. Had I shot this scene with a conventional lens – let’s say the 24-70mm f/2.8 – the sea would not have appeared as layered or deep.

Nikon 1AW1 | 300mm | f/8 | ISO-160 | Shutter: 1/500 sec.

Dubai_3152

Compressing the scene once again – brining the mountains closer to the dunes. I’m in a chase jeep here, bumping all over the road, but the VR made sure things were smooth (of course, 1/1600 of a second on the shutters helps).

Nikon 1AW1 | 195mm | f/8 | ISO-160 | Shutter: 1/1600 sec.

 Dubai_3123

I love shooting mountains with long lenses – sometimes, like at sunrise in the Arabian Desert, the results can be spectacular. I tried shooting this with my 200mm lens on the D800’s FX sensor, and the results were nothing even close to similar.

Nikon 1AW1 | 300mm | f/10 | ISO-160 | Shutter: 1/2500 sec.

South Africa_4345-2

Getting in on the surf action without getting my feet wet.

Nikon 1AW1 | 181mm | f/7.1 | ISO-200 | Shutter: 1/250 sec.

South Africa_4371

Nikon 1AW1 | 149mm | f/7.1 | ISO-160 | Shutter: 1/800 sec.

Let me tell you what I don’t love:

Let me first qualify this by saying I’m nitpicking. I really do love this lens.

– The lens hood. When the barrel is extended and the hood is attached, the lens can look a bit ridiculous. It’s too long for my liking with the hood attached. Small gripe, really. I’ll probably leave the hood at home most days.

– The Price Point

Not pairing the tripod collar with the lens and asking consumers to pay an additional $70 is ridiculous when you’ve already priced this lens at $1000. If the lens were a steady f/4 aperture throughout the zoom range, then I could see this being a reasonable price – but to charge an extra $70 for the collar on top of the premium price for a variable aperture lens is a bit much, Nikon.

That said, I still think this lens is spectacular value considering what you can come away with. For me, it has way more value than the Tamron or Sigma super zooms because the Nikon weighs a fraction of what they weigh, the glass (and resulting image quality) is far superior, and it works flawlessly with the Nikon 1 series of cameras.

This lens won’t replace my DSLR Nikon zooms, but it is absolutely the perfect companion to take with me out into the field when I need to get close, close, and closer to the action.

I’m right back into the wild on assignment in January – here’s what I’m taking with me on my next safari:

Nikon 1 V3 Body | 1 Nikkor VR 70-300mm f/4.5-5.6

Nikon D800 Body | Nikkor 70-200mm f/2.8 | Nikon TC-17E II 1.7x Teleconverter

Last but not least, a big thank you to Goway Travel, who made my adventures in both South Africa and Dubai possible – and such a sterling success.

EXPLORE

Goway Travel is the global leader in tailor made travel experiences to Africa, and has been curating experience-driven expeditions to the world’s most remarkable destinations since 1970. Beyond Phinda, Goway can arrange whale shark excursions, Shakaland and Zulu village visits, scuba safaris, cultural tours through Durban and KwaZulu-Natal, and more. www.goway.com


Rhino Camera Gear: Black Friday Sale

Carbon-Core-Home Photo courtesy Rhino Camera Gear.

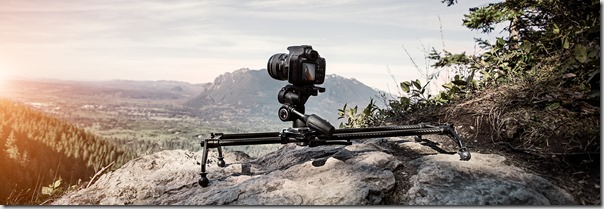
When I started using Rhino Camera Gear earlier this year, my life as a videographer instantly became easier – and a bit more fun, too. I’ve never used equipment that changed the shooting game in such incredible ways at such an affordable price: I can say without a doubt that my Rhino Slider is the best piece of kit in my video bag.

If you’re not using Rhino Gear, now is the time to get your hands on it – their Black Friday Sale has hit the web, and it’s a doozy. You can take advantage of huge savings on sliders (I’m quite partial to the 4ft Rhino Slider Pro), steady cam units, and camera rigs.

Follow this link to check out all of the Rhino Camera Gear deals, and start making magic.

What’s the Price of Peace of Mind?

What’s the price of peace of mind?


This is a very real question when you travel as often as I do. I’m sent to far-flung

destinations for a living, and while I travel well and I travel as safe as I can, now and

again I find myself wondering how I’d react in a real emergency; what would I do if

a grizzly bear mistook my melon for a honeypot while trekking through Alberta’s

remote wilderness? How would I get home if I were stung on the face by a snake in

the red center of Australia? How would I get emergency care if a raging bull did a

number on my questionable bits while running through the streets of Pamplona?

These are the questions that trouble my simple mind.


Enter MedjetAssist and what amounts to the world’s greatest peace of mind

program for travelers. A global air medical transport membership program,

MedjetAssist offers members medical transport services in the event of an

emergency – and allows members to choose exactly which hospital they’d like to be

delivered to in their home country. So if you’re particularly fond of a nurse on the

third floor of your home hospital’s trauma wing, or you feel quite attached to the

transesophageal echocardiogram equipment in your local cardiologist’s office, you

can have your cake, and eat it too.


I would never think of leaving home without comprehensive insurance on my

photography equipment, so it only makes sense that I have spectacular protection

for the gear that really counts. MedjetAssist is the perfect program for me because it

allows me to go at my work – and my travels – without making compromises based

on what could be suspect local medical care and conditions. With MedjetAssist, my

own hometown care is never more than a phone call away, and I like that.


Program membership comes with additional benefits. I have access to Travel,

Health & Security Precautions for International Destinations, Visa, Passport &

Immunization Requirements, telephone interpretation and medical referrals.


MedjetAssist is a comprehensive medical transport membership program in

an affordable package – and a small price to pay for peace of mind. Short-Term

memberships start at $99 and $260 for annual.

Rise With The Rock

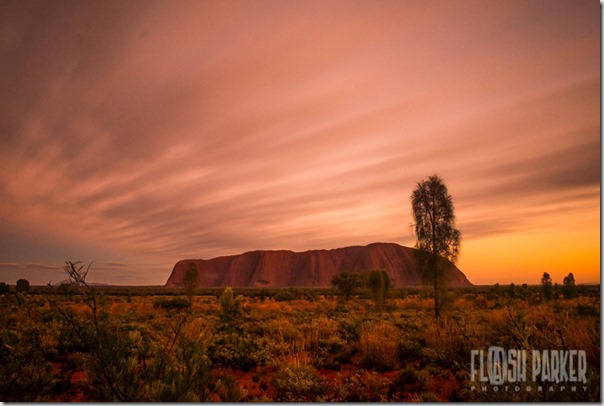
Australia_79278

95% of visitor’s to Australia’s Northern Territory and the Outback come to see Uluru – otherwise known as Ayers Rock. The rest? They come for the camels. Or the snakes. Or the red sand.

The Down and Dirty:

If you’re a fan of long-exposure photography but never knew where to begin – if the process of setting up and shooting such an image has ever seemed intimidating – this walkthrough should please you. It’s deceptively simple to put together a frame like this, and if you follow these steps, you’ll be out the door and firing away in no time.

The first thing to consider when planning a long-exposure image is just what you want the final frame to look like. Take a look at your scene; are the clouds moving quickly? Do you have have running water somewhere in the frame? If the answer is yes, a long-exposure image should be able to lend a feeling of motion to your photograph. But also keep in mind elements that can become distracting. Do you have trees, grass, or other foliage in the frame that can be affected by the wind? If the answer is yes, then there’s the potential to add distracting blur with a long exposure.

The morning I shot this image of Uluru was perfectly still; there was no risk of adding blur to the trees and brush, so my only real variable were the clouds. I began this exposure just as the sun was rolling over the horizon (out of frame, to the right) and continued on through for 145 seconds; I knew this would allow the clouds time to streak across the sky. How did I know this? I started the timer on my phone, looked up, and watched how far the clouds went in 15 seconds, then guessed at how quickly they’d move across my entire frame. Not an exact scientific measure by any means, but I usually shoot on emotion and intuition, so I had a good feeling that this would yield the results I was after.

Now, if you’ve done any sort of long-exposure work on an DSLR in the past, you know that most cameras can’t go past the 30 second exposure limit without a timer; you could easily pull off this same shot with a simple cable release, but I prefer to do all of my timed work with a Trigger Trap Mobile Dongle + App; this bit of kit is invaluable for long-exposure photography, and is my go-to gear for star trails, bramping, timelapse video, and more. Now, knowing that your camera can only make an exposure reading for a maximum of 30 seconds, you need a way to exposure properly for anything longer than that. You don’t want to guess at correct exposure when shooting for 3, 5, or 10 minutes at a time – that’s a long time to wait while you goof up an image, especially when good light is so fleeting. A bit of rudimentary math will help you out in this scenario.

First reading: At an aperture of f/4 and ISO of 200, my exposure is 30 seconds.

I use a large aperture for my first reading so that my exposure times aren’t crazy long – this allows me to take a quick test frame to see what my light is going to look at.

Second reading: At an aperture of f/8 and ISO of 200, my exposure is 60 seconds.

I doubled the aperture, which automatically doubled the length of time the shutter needed to be open. You can see just how easy this is.

Third reading:  At an aperture of f/18 and ISO of 50, my final exposure is 145 seconds.

I rolled the aperture to f/18 to ensure sharpness throughout the frame, tweaked my ISO just a touch (I wanted to be a little darker than the “proper” exposure reading so I didn’t blow out the sun) and was left with an exposure length of 145 seconds.

Step by Step:

1. Compose your scene. Lock in the “look” before you start fiddling around with exposure, timers, etc. so that you can be confident you’re going to get the image you want. Oh, and make sure you’re set up on a sturdy tripod.

2. Lock your focus; I focus these scenes manually (I often do this in Live View and “peak” to ensure pinpoint accuracy).

3. Set your exposure length via your timer (buy yourself a Trigger Trap. It will change the way you do this sort of work).

4. Open the shutter, and relax. Grab a coffee and marvel at your surroundings. Do what you do with time to kill in one of the world’s most beautiful places.

Image Specs:

Camera: Nikon D800

Lens: Nikkor 24-70 f/2.8

Aperture: f/18

ISO: 50

Shutter Speed: 145 seconds

Focal Length: 24mm

For the Making of:

1. Nikon D800 Camera

2. Nikkor 24-70mm f/2.8 lens

3. 77mm B+W Kaesemann XS-Pro Circular Polarizer

4. Trigger Trap Mobile Dongle + App

5. Manfrotto BeFree Carbon Fiber Travel Tripod

Special Thanks:

Special thanks to my friends at AFAR Magazine, USTOA, and Goway Travel for sending me on an incredible assignment out into Australia’s Northern Territory. Australia had been at the top of my bucket list for years, and it was even more incredible than I could have imagined.

Catch up with me on Twitter: @FlashParker

Follow my photography adventures on Instagram: FlashParker

The Cowboy Poet’s Way

Canada_77686

A bit of background on the image, as originally posted for AFAR:

For the Rhythm of Cowboy Poetry

The Bar U Ranch had a hand (and a hoof, and a horseshoe) in shaping life in Western Canada, and today is preserved as a national historic site packed with interactive exhibits, immersive educational programs, and more. If you’re lucky, your visit may coincide with the famed Bar U Chuckwagon Cook-Off (annual, first weekend in June), and you and your posse will get a chance to taste a bit of the Wild West.

And don’t forget to actually enter the historic buildings (they’re not just for show), many of which are manned by period players fully dedicated to bringing the Bar U Experience to life. What looks, feels, and smells like a leather shop is actually the domain of the Bar U’s poet cowboy, and if you’re lucky, and if you’re polite, he might just recite one of his original elegies for you and your crew.

The Down and Dirty:

If this were a commercial shoot, and my one and only goal was to come back home with a brilliant portrait of the Cowboy Poet in his studio, I wouldn’t have left light to chance – I would have arrived at the Bar U Ranch with a bag full of lights, modifiers, and other lighting gear. But Bar U was just one stop on a jam-packed itinerary, and I had roughly five minutes to get in, shoot a portrait worthy of printing, and move on to the next stop. I lucked out with the way that the light came streaming in the window (left of frame), but had only seconds to recognize how that light was mixing with the ambient leaking in to the rest of the frame, and how it would look on the cowboy’s face and clothing.

If I had let the camera think for me, this would have been a mess. The camera would have tried to even out the light throughout the scene, and would have pushed the exposure high enough to brighten the background – in the process this would have blown out the delicate highlights on the face, hands, and hat. Because I was shooting in Aperture Priority – in order to control my depth of field, of course – I quickly had to roll my exposure compensation dial back –.07 of a stop (three clicks) in order to bring the exposure back down to earth. This may not seem like a lot, but it’s a big deal when dealing with lighting extremes. I also touched up my focus manually here; even when you place your Auto Focus cursor over what you think is your subject’s face, the camera can, when the lighting is tough, hunt for contrast – in this case, it hunted for the hat, which popped against the dark background. Had the brim of the hat been in focus, the eyes, at F/4, would not have been as sharp as I needed them to be.

I also recognized that even with bright light on my subject, this scene was still rather dark; I had to push my ISO all the way to 1000 just to get a shutter speed of 1/30th of a second. This was a bit of a gamble considering the cowboy poet was moving quite a bit, but I managed to freeze him decently well.

Image specs:

Camera: Nikon D800

Lens: Nikkor 24-70 f/2.8

Aperture: f/4    

ISO: 1000    

Shutter speed: 1/30    

Focal Length: 42mm


Special Thanks:

Special thanks to my friends at AFAR Magazine and Travel Alberta for sending me on an incredible assignment in the Great White North. It’s always good to go home. I’ve collected a few of my favorite highlights into an AFAR Wanderlist that you can see here: The Great Canadian Grizzly Odyssey.

Catch up with me on twitter: @FlashParker and instagram: FlashParker

Lonely Planet Magazine: Spanish Flavours

p52-59_Spain-lowres-1

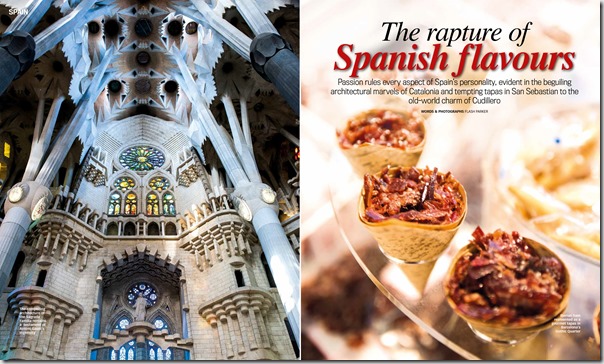
My latest feature for Lonely Planet Magazine – a road trip story about the sights, sounds and tastes from Barcelona in the East to Santiago in the West, and all the northern coastal highlights in between.

“The problem with Spain is that Hemingway didn’t write about enough of it. Had the old man from the sea done more than romanticize the bulls of Pamplona and Ronda, tip over barstools from one corner of Madrid to the other, and immortalize travel in the south the South during his lifelong trysts with transnationalization, perhaps more of this beautiful country would exist at the forefront of the wayfaring traveler’s imagination. Yet Hemingway spent a finite number of days in Spain, and missed out on many of its essential experiences that have remained on the margins of bucket lists since Papa passed away. Spain’s Northern provinces in particular, with their tremendous natural attractions, historical cache, and gastro marvels, may inspire you to write volumes of prose all your own (if you can put down the tapas plates and wine glasses long enough to pick up a pencil and paper), while Barcelona, at the heart of Catalonia, has more cultural, culinary, and aesthetic charms than most other countries. Spain’s intoxicating diversity is exemplified on a trip from Catalonia to Galicia, with diversions through Basque Country and Cantabria along the way. “

Click through for larger images.

All images shot with Nikon D800 + Nikkor 24-70mm f/2.8 lens.

 p52-59_Spain-lowres-2

 p52-59_Spain-lowres-3

 p52-59_Spain-lowres-4

 p60_Spain MIH-lowres

Catch up with me on twitter: @FlashParker and instagram: FlashParker

Tierra Story

Chile_74003 From the pool at the Tierra Atacama: you want to be here, now. Trust me.

If you’re keen on checking out two of the most spectacular locations on earth (hint: you 100% are), check out this contest being put on by the Tierra Hotels group. www.tierrastory.com

The concept is simple:

“At Tierra Hotels, we love hearing travel stories. Share yours and win a 3-day trip to Chile at one of our hotels.

Facebook: Post on our Facebook wall one of your stories from around the world (Could be anywhere and any story!) + photo, add #travelstory #tierrahotels.

Twitter: Write a tweet with one of your stories from around the world (Keep it short! Could be anywhere and any story!) + photo, add #travelstory #tierrahotels.

Instagram: Upload a photo + one of your stories from around the world (Could be anywhere and any story!), add #travelstory #tierrahotels.”

See? I told you – simple. I’ve been to the Tierra Atacama property, and it’s magic; I’m all over this contest for a chance to visit the Tierra Patagonia property, which is purported to be every bit as spectacular as its desert-bound cousin.

Saint Lucia for USA Today

LUCIA_55775-2

Starry night Over Saint Lucia

I skipped down to the Caribbean paradise of Saint Lucia to write a story for USA Today’s Go Escape Magazine, and to check out the Ladera Resort, a property that has landed on just about every “Best Hotels in the World” list written in the past ten years. Long story short; Ladera was as remarkable as advertised, and Saint Lucia is stunning.

USA Today Travel has posted my print feature online, and you can check it out here – thought the magazine is still on news stands through July, so you can grab a copy to check out more images from me, and some fantastic travel pieces from my travel writing comrades.

Click here for the whole story.

USA TODAY TRAVEL’s Go Escape magazine is available on newsstands now through July 26.

Special thanks to my friends at J Public Relations for arranging my visit to Ladera, Saint Lucia’s stunning crown jewel. Ladera is the only resort in St.Lucia located on the UNESCO World Heritage Site, overlooking the Pitons and the Caribbean Sea. www.jpublicrelations.com www.ladera.com

Catch up with me on twitter: @FlashParker and instagram: FlashParker

Don’t Fight the Light

Argentina_74330

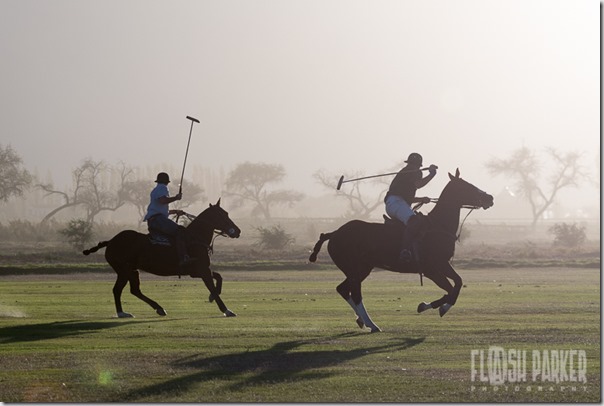
Today I’m going to discuss light – and how I learned a few years back not to fight it. I’m using this image shot at the Grace Cafayate in Argentina to illustrate my point.

Tools of the Trade:

– camera with manual settings

– any old lens in your bag (this write up is more about technique and less about gear)

The Down and Dirty:

This image is about what I don’t do as a photographer now versus what I would have done four or five years ago. Four or five years ago, I would have seen the blown highlights in the sky and the soft light as enemies to be vanquished from the battlefield, or balls to be smacked off the polo pitch. I would have strapped on at least one graduated neutral density filter to bring the sky back into play, and I would have jacked the contrast to obscene levels. I may have even fought against the gorgeous color of the light. I hate my old photographic self. He was a monster.

These days I do my very best to capture the world as it is presented to me. I go for natural beauty – not the type manufactured later in Photoshop (not to say that images don’t need some tweaking from time to time, but as a travel photographer, it’s sort of a good idea to be in the right place at the right time in the first place). This means that I shoot when the light is good, like it was this day in Cafayate. The sun was going down, and about to disappear behind a mountain ridge – but for ten solid minutes, it glowed beautifully just like this.

The first thing I wanted to do was represent the color accurately; Auto-White Balance mode would have washed out my color, so I flipped my WB setting to Cloudy to allow that golden light to shine. Next, I made the call to shoot with an aperture of f/5 because I wanted the players and their horses to be tack sharp, but the background to be nice and soft. This had the added benefit of allowing me to use a shutter speed of 1/1600, at ISO 200 – perfectly fast enough to freeze motion, and to keep the image free of noise.

Again, the light – I really wanted the light to be the star of the show here, and not beat it back with a stick. I wanted the image to have a bright, like feel to it, so I made sure to meter for one of the riders, and not the sky or the background. This kept the camera from pulling the exposure back to far and making the image a dark mess.

I used a Nikkor 80-200mm f/2.8 lens to capture this image – I was standing on one side of the polo pitch, so I needed a bit of reach to see the guys on the other side. This was shot at 112mm.

Here’s what the image might have looked like had I let the camera do all the thinking for me:

Argentina_74330-3

This is kind of gross, to be honest with you. It looks like two guys playing polo in a nuclear winter, not in one of the prettiest places on earth. The camera wanted badly to “fix” the blown highlights in the sky, “correct” the color, and even the playing field, so to speak. This is exactly why it’s important that you understand the ins and outs of your gear, and know what the camera is going to do before it does it. You need to know everything about exposure and light, and you need to know what your histogram is saying – so that you can ignore all of it and make the camera do what you want it to do. When I’m working, I rely on technique and emotion, not on what the camera wants me to see, or how it wants to represent a scene. There’s a big difference between a guy who likes cameras and a photographer; tell the camera what to do. Be a photographer.

Image specs:

Camera: Nikon D800

Lens: Nikkor 80-200 f/2.8

Aperture: f/5     ISO: 200     Shutter speed: 1/1600     Focal Length: 112mm

Special Thanks:

Special thanks to my friends at J Public Relations for arranging my visit to the gorgeous Grace Cafayate in Argentina’s remarkable Salta Region; Cafayate is about as impressive a wine region as there is on earth. Stay tuned for my print features, coming to a few of my favorite mags later this year. www.jpublicrelations.com www.gracehotels.com

And of course, huge thanks to Chimu Adventures for helping to put together a brilliant South American itinerary.  Chimu Adventures is the finest travel outfitter in Argentina, and offers tailor-made expeditions that get at the heart of the country’s most essential experiences. www.chimuadventures.com

Flash Light Photography Expeditions:

For more handy how-to photographic bliss, check out the Flash Light Expeditions Pocket Guide series I’ve written and photographed with Dylan Goldby of www.welkinlight.com

Chiang Mai, Thailand: While We’re Here

This pocket guide from Flash Light Photography Expeditions will help you get the most out of your visit to Chiang Mai, Thailand. Created to support our annual Northern Thailand Photography Expedition, this tiny tome is all about helping you craft a winning travel portfolio during your time abroad.  Click here for more.

 Flash in the Wild: A Pocket Guide to the Right Light

Welcome to the wild. This pocket guide will help you get the most out of your small off-camera flash while shooting on location. Whether you’re a burgeoning amateur, semi-pro or professional photographer, you’ll benefit from the more than 20 step-by-step breakdowns in our new guide.
This guide is for anyone who ever wanted to create a big scene with small lights, but didn’t know where to begin. From city streets to the darkest wood, we work through one exciting location after the other while bending light on a whim. We’ll show you what you need to pack into your kit, how to build a lightweight, everyday shooting system, and most importantly, how to react to, read, and control your light. Click here for more.