For 1 Minute of Your Time

I love it when I get sent to the beach.

The beach means sun and sand and surf, frosty margaritas, and Speedo fishnet juniors. I’ve had the same one since I was twelve, and though it has frayed a bit at the edges, it still fits like a charm.

Beyond the inappropriate swimwear, I always look forward to casting a spell over the ocean. From the moment I picked up a camera, I’ve loved long exposure photography, its power to manipulate water, and how it can transform what would otherwise be a mundane scene into something visually stunning and ephemeral (as ephemeral as a photo can be, anyway).

A couple of months ago I was sent down to the Dominican Republic to wrap my head around Punta Cana. I had an amazing time – between diving excursions, helicopter trips, lagoon cruises and horseback rides, I found some time – and the required energy – to shoot when the sun went down. 

I go at the ocean with an image already in my head – I’m not reacting to the setting and the scene as much as I am manipulating it. To manage this manipulation, I need a few tools.

THE GAZEBO BLUES
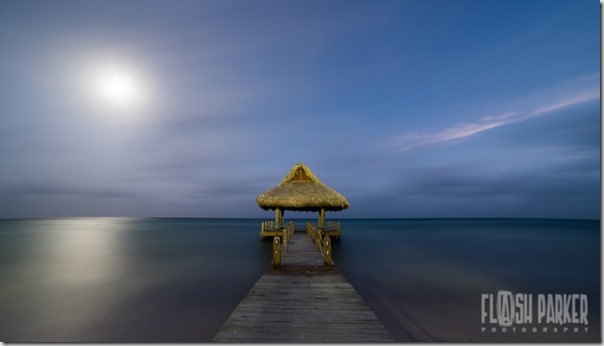
Dominican_88511-2-2

The Down and Dirty:

*I wrote the following few paragraphs when detailing the Uluru long exposure frame a few months back. Just a quick refresher here, as many concepts remain the same.

“If you’re a fan of long-exposure photography but never knew where to begin – if the process of setting up and shooting such an image has ever seemed intimidating – this walkthrough should please you. It’s deceptively simple to put together a frame like this, and if you follow these steps, you’ll be out the door and firing away in no time.

“The first thing to consider when planning a long-exposure image is just what you want the final frame to look like. Take a look at your scene; are the clouds moving quickly? Do you have have running water somewhere in the frame? If the answer is yes, a long-exposure image should be able to lend a feeling of motion to your photograph. But also keep in mind elements that can become distracting. Do you have trees, grass, or other foliage in the frame that can be affected by the wind? If the answer is yes, then there’s the potential to add distracting blur with a long exposure.

“Now, if you’ve done any sort of long-exposure work on an DSLR in the past, you know that most cameras can’t go past the 30 second exposure limit without a timer; you could easily pull off this same shot with a simple cable release, but I prefer to do all of my timed work with a Trigger Trap Mobile Dongle + App; this bit of kit is invaluable for long-exposure photography, and is my go-to gear for star trails, bramping, timelapses, and more. Now, knowing that your camera can only make an exposure reading for a maximum of 30 seconds, you need a way to exposure properly for anything longer than that. You don’t want to guess at correct exposure when shooting for 3, 5, or 10 minutes at a time – that’s a long time to wait while you goof up an image, especially when good light is so fleeting.”

So here we are – now on to the beach!

Step by Step:

1. Compose your scene. Lock in the “look” before you start fiddling around with exposure, timers, etc. so that you can be confident you’re going to get the image you want. Oh, and make sure you’re set up on a sturdy tripod.

I wanted the gazebo to stand out in my frame, but I also wanted to catch a bit of sky and sea. The water was fairly rough, so I knew from past experience that an exposure time beyond 30 seconds was going to smooth it out nicely. Heck, I could have smoothed out the water with a 10 or 15 second exposure – but I also wanted to smooth out the slow-moving clouds.

2. Lock your focus; I focus these scenes manually (I often do this in Live View and “peak” to ensure pinpoint accuracy). Here, of course, I focused on the gazebo. It doesn’t get any easier.

3. Set your exposure length via your timer (buy yourself a Trigger Trap if your camera is incapable of shooting anything beyond 30-second exposures; this little piece of kit has made my job incredibly easy).

For this image I knew that I wanted to smooth our those pesky clouds, so I dialed in an exposure length of 3 minutes. This is all about personal preference; 30 seconds would have easily smoothed out the water, but left the clouds fairly well formed. The length of the exposure greatly affects the look of the final image, and is all about what you want to see.

4. Open the shutter, and relax. Grab a coffee and marvel at your surroundings. Do what you do with time to kill in one of the world’s most beautiful places.

Image Specs:

Camera: Nikon D800

Lens: Rokinon 14mm f/2.8

Aperture: f/20

ISO: 50

Shutter Speed: 180 seconds

Focal Length: 14mm

THE NIGHT
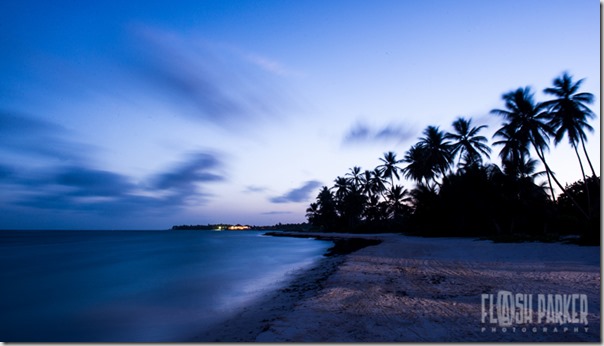
Dominican_88799

This image is a prime example of what moving objects can do to your scene – see Exhibit A: Punta Cana palm trees. However, in this case I quite like the movement; it lends a bit of ephemeral flare to the image, and works decently well with the cloud streaks and the smooth water. Again, this is personal choice; some photographers want trees to be still, others don’t mind a bit of motion blur.

Two things changed between the first image and this one: first, the lens: I swapped out my ultra-wide for my standard zoom, and shot at 29mm. Second, the shutter speed: I had more light (thanks to the setting sun beyond the trees) and thus didn’t need to expose for 180 seconds – in this image I opened the shutter for 120 seconds.

It always amazes me just how much you can change the look and feel of a scene just by adding or subtracting a few seconds from your shutter speed. Making this sort of image is deceptively simple – you can easily practice with any camera that shoots up to 30 second exposures – but to really take your gear to the next level, invest a few pennies into a release like the incredible TriggerTrap.

For the Making of both images:

1. Nikon D800 Camera

2. Rokinon 14mm f/2.8 lens and Nikkor 24-70mm f/2.8 lens

3. 77mm B+W Kaesemann XS-Pro Circular Polarizer

4. Trigger Trap Mobile Dongle + App

5. Manfrotto BeFree Carbon Fiber Travel Tripod

Special Thanks:

Special thanks to my friends at AFAR Magazine for sending me on an incredible assignment to one of the Dominican Republic’s most remarkable locations. Also to my gracious hosts at the Puntacana Resort & Club – the Dominican’s premiere vacation destination.

Catch up with me on Twitter: @FlashParker

Follow my photography adventures on Instagram: FlashParker

Gear Review: Nikon 1 Nikkor VR 70-300mm f/4.5-5.6

Bigger is better when you’re face down in the bush. I think Hemmingway once said that to Fidel Castro – I’m sure Ernie was talking about the size of his scotch tumbler or the gauge of his rifle shells, but for my own purposes I’m going to ape the phrase and use it to refer to big, long glass.

But first I’d like to qualify this gear review and tell you exactly why I need a big, long lens in the first place. I’m a travel photographer first and foremost, which means from time to time I’m tasked with shooting animals. But I’m not a wildlife photographer; I don’t carry with me into the field 1200mm lenses that weigh 200lbs, 12-foot monopods, or blocks of salt to lure animals out of hiding. I travel as light as I possibly can with just enough gear to get my job done.  Most of my shooting is of the up-close-and-personal variety, which means my Nikkor 24-70mm f/2.8 and Nikkor 50mm f/1.4 lenses see the most field action.  I’m usually shooting people in urban or rural environments, and only use my longer lenses – like the Nikkor 70-200mm f/2.8 – to shoot portraits or compress perspectives.

That said, I’ve been sent out on some amazing travel assignments these last few years, some with a strong wildlife component. I’ve stared boobies in the face in the Galapagos Islands, held my own against grizzly bears in Alberta, and danced around cheeky vicuna in Chile. I’ve needed big glass on these and half a dozen other assignments, but I’m loathe to carry across the world a lens that weighs more on its own than the rest of my luggage. Lucky for me, I found the perfect solution just before I set out on safari assignments to Dubai and South Africa.

Enter the Nikon 1 Nikkor VR 70-300mm f/4.5-5.6 lens.

This lens, designed specifically for the CX-sensor Nikon 1 camera series, provides an effective focal length of 189-810mm. I don’t care what tech types have to say about “effective reach vs active reach” and all that sensor size vs length nonsense – if a lens is able to provide reach in the 800mm range and not weigh more than my car, I’m willing to give it a try.

I stressed over which lenses to take with me to Africa for weeks; I considered buying the Nikon AF-S NIKKOR 80-400mm f/4.5-5.6G ED VR Lens, but after testing it in store, I knew I wanted even more reach.

I bought the Sigma 150-500mm f/5-6.3 DG OS HSM APO Autofocus Lens for Nikon AF and returned it after one day, as I found it almost unwieldy and too different from my Nikkor lenses for me to operate smoothly and efficiently. It also didn’t fit into my camera backpack, which is sort of ridiculous.

I wanted to try the Tamron SP 150-600mm f/5-6.3 Di VC USD Lens for Nikon, but so do a lot of people – the lens has been unavailable for months.

I wasn’t even going to consider lenses like the Nikon AF-S NIKKOR 800mm f/5.6E FL ED VR Lens or the Nikon AF-S NIKKOR 500mm f/4G ED VR Lens because I didn’t want to have to pay a sherpa to haul my gear, and I’m not after lenses that cost the same as fighter jets.

It seemed like getting over 400mm for this adventure was out of reach, until I stumbled upon the Nikon 1 series of lenses. I took a flyer, ordered the lens, and got my hands on it about 3 hours before I departed for Dubai.

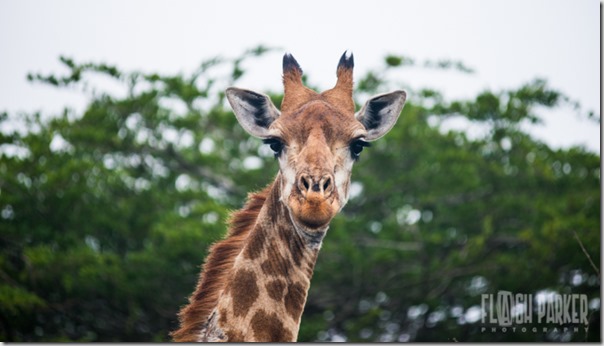
South Africa_6105

King of the Jungle: Tack sharp results with this lens, even extended out to 267mm – handheld on a mirrorless body lacking a digital or optical viewfinder.

Nikon 1AW1 | 267mm | f/6.3 | ISO-560 | Shutter: 1/125 sec.

Let me tell you what I love:

– The reach.

This lens is a monster, as advertised. 189-810mm is mind boggling, no matter what sensor you’re shooting on. I had a great time shooting game – from lions and leopards to crocodiles and kingfishers.  I’ve never had a lens I could use for birding, until now.

South Africa_5829

Even fully extended, this Nikon 70-300 is incredibly sharp.

Nikon 1AW1 | 300mm | f/7.1 | ISO-280 | Shutter: 1/250 sec.

– The sharpness.

Sharp as a tack, from what I’ve seen so far. Surprisingly so – and throughout the entire focal range. I can use this lens at 70mm the same way I can at 300mm, which is a serious testament to build quality.  I used this lens all the way extended quite frequently on this trip, just to see how it would respond, and was quite thrilled with the results.

South Africa_5889

Even in reasonable light this lens is immaculately sharp. It struggles as you’d expect when it gets darker (due to the relatively small maximum aperture) but with the excellent VR, I could handhold this lens until dusk. Also note how slow my shutter speed was in this case; using 1/60 at this focal length should lead to blurry images, but out of the dozen I shot of these monkeys, only one was not crisp.

Nikon 1AW1 | 112mm | f/7.1 | ISO-1250 | Shutter: 1/60 sec.

– The Bokeh.

Initially I was worried that bokeh wouldn’t be pleasing, given the sensor size and the speed of the lens, but that concern was quickly quashed. Thanks to the 7 rounded diaphragm blades, out-of-focus areas are rendered very smoothly – and when you’re shooting at these focal lengths, you’re generally going to get smooth backgrounds no matter what aperture you’re using.

South Africa_3631

Bokeh as smooth as silk.

Nikon 1AW1 | 200mm | f/7.1 | ISO-640 | Shutter: 1/320 sec.

– The Autofocus.

Lightening fast. Ridiculously so, in fact; the Nikon 1 series of cameras are renowned for their autofocus capabilities, but this lens on a Nikon 1 body takes things to another level. Even in low light the lens rarely hunted for focus. Easily my second favorite aspect of using this lens (after length): the AF is simply blazing fast.

South Africa_5358

A good example of the manual/macro touch-up ring in action: The camera kept locking focus on the grass in the foreground, and was unable to find mama lioness. I simply tweaked the focus ring (which zooms into a macro mode automatically to pinpoint eye location), and locked on the cat’s face. The macro focus mode can take a bit of getting used to, but once you’ve figured it out, you’ll wish that all your cameras and lenses behaved in the same manner.

Once again, notice the shutter speed – 1/25 is outrageously slow for this focal length; with my D800 and 70-200mm lens, I can rarely get a steady frame at 1/25 and a length out past 100mm.

Nikon 1AW1 | 235mm | f/5.6 | ISO-3200 | Shutter: 1/25 sec.

 South Africa_4965

Nikon 1AW1 | 300mm | f/8 | ISO-800 | Shutter: 1/80 sec.

Now, the caveat here is that I was using this lens on my Nikon 1AW1 – my underwater body. Two things on this body make focusing with a big lens a pain; the lack of a viewfinder and the lack of a focus selector button. The lack of a viewfinder is obviously problematic for when shooting in bright sunlight (even seeing the screen can be a pain), and I’m not as steady as when holding a camera to my face and looking through the finder. The lack of a focus selector means that sometimes the focus locked on a tree or the wrong animal or something that it was never supposed to see – I could use the neat little “macro-focus touch up” dial on the lens, but doing this while keeping the camera steady and looking at the screen was a pain. Do like me and pair this lens with a Nikon 1 body with a viewfinder – the first purchase I’m making when I head back out on an assignment where I’ll be using this lens is the Nikon 1V3, which will take care of both of these issues.

Dubai_3075-2

Handheld at 300mm – effectively 810mm on the CX sensor. No cropping, and no adjustments – this is what I saw through the lens, and what the camera captured. 

Nikon 1AW1 | 300mm | f/5.6 | ISO-160 | Shutter: 1/400

South Africa_4896-3

Getting in close is a great reason to buy this lens – it’s an indispensible wildlife and safari tool, in my opinion. But it’s also a brilliant device for compressing distance, and bringing your background closer to your foreground. Had I shot this scene with a conventional lens – let’s say the 24-70mm f/2.8 – the sea would not have appeared as layered or deep.

Nikon 1AW1 | 300mm | f/8 | ISO-160 | Shutter: 1/500 sec.

Dubai_3152

Compressing the scene once again – brining the mountains closer to the dunes. I’m in a chase jeep here, bumping all over the road, but the VR made sure things were smooth (of course, 1/1600 of a second on the shutters helps).

Nikon 1AW1 | 195mm | f/8 | ISO-160 | Shutter: 1/1600 sec.

 Dubai_3123

I love shooting mountains with long lenses – sometimes, like at sunrise in the Arabian Desert, the results can be spectacular. I tried shooting this with my 200mm lens on the D800’s FX sensor, and the results were nothing even close to similar.

Nikon 1AW1 | 300mm | f/10 | ISO-160 | Shutter: 1/2500 sec.

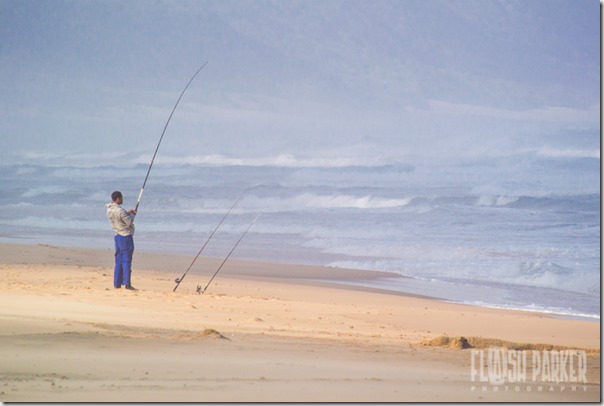
South Africa_4345-2

Getting in on the surf action without getting my feet wet.

Nikon 1AW1 | 181mm | f/7.1 | ISO-200 | Shutter: 1/250 sec.

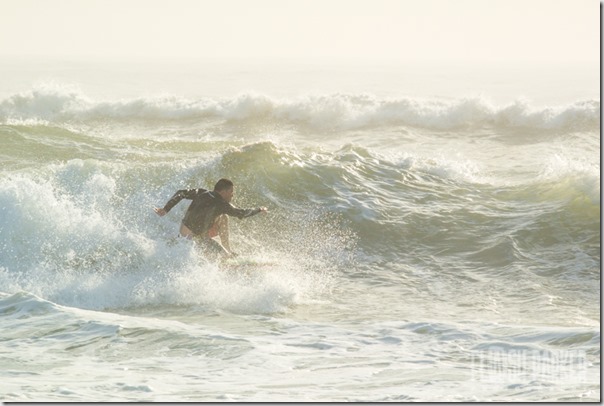
South Africa_4371

Nikon 1AW1 | 149mm | f/7.1 | ISO-160 | Shutter: 1/800 sec.

Let me tell you what I don’t love:

Let me first qualify this by saying I’m nitpicking. I really do love this lens.

– The lens hood. When the barrel is extended and the hood is attached, the lens can look a bit ridiculous. It’s too long for my liking with the hood attached. Small gripe, really. I’ll probably leave the hood at home most days.

– The Price Point

Not pairing the tripod collar with the lens and asking consumers to pay an additional $70 is ridiculous when you’ve already priced this lens at $1000. If the lens were a steady f/4 aperture throughout the zoom range, then I could see this being a reasonable price – but to charge an extra $70 for the collar on top of the premium price for a variable aperture lens is a bit much, Nikon.

That said, I still think this lens is spectacular value considering what you can come away with. For me, it has way more value than the Tamron or Sigma super zooms because the Nikon weighs a fraction of what they weigh, the glass (and resulting image quality) is far superior, and it works flawlessly with the Nikon 1 series of cameras.

This lens won’t replace my DSLR Nikon zooms, but it is absolutely the perfect companion to take with me out into the field when I need to get close, close, and closer to the action.

I’m right back into the wild on assignment in January – here’s what I’m taking with me on my next safari:

Nikon 1 V3 Body | 1 Nikkor VR 70-300mm f/4.5-5.6

Nikon D800 Body | Nikkor 70-200mm f/2.8 | Nikon TC-17E II 1.7x Teleconverter

Last but not least, a big thank you to Goway Travel, who made my adventures in both South Africa and Dubai possible – and such a sterling success.

EXPLORE

Goway Travel is the global leader in tailor made travel experiences to Africa, and has been curating experience-driven expeditions to the world’s most remarkable destinations since 1970. Beyond Phinda, Goway can arrange whale shark excursions, Shakaland and Zulu village visits, scuba safaris, cultural tours through Durban and KwaZulu-Natal, and more. www.goway.com